Friday, June 30, 2006

DIY Carbon top cap


So, in the last installment of the +1lap DIY channel, I showed you how to make carbon bar end caps. This time were making a carbon top cap assembly.

So, let’s start from the beginning. Topcaps are for suckers. The topcap is tightened to compress the headset bearings appropriately, then the stem is tightened down, then the top cap becomes a gravity virus on your bike. They don’t really do anything after the stem is tightened (other than keep rain and mud out of your steering tube) I mean, its not holding the compression still, because your stem isn’t loose it it? I rode all last season in cyclocross without a topcap at all.

I got teased a little, “what trying to save some weight?”

Me: “Umm yes.”

Well, some people have crammed a beer bottle cap into the steering tube to add a little flair. That works well. But I’ve noticed sometimes the cap doesn’t fit in there too great. Schmolke makes a carbon topcap and they can be bought for $60. They say that there’s supports the carbon steer tube from being crushed. Well, my Alpha Q fork already has a compression thingy in there protecting the steering tube, so I decided to make a decorative top cap that would look cool and keep the rain and mud out.

I used the same carbon plate as I did for the bar caps. But you’ll need another type of carbon from Dragonplate for this project too. You’ll need the carbon veneer stuff (its bendy). This is what fits inside of the steering tube and then the carbon plate is JB welded onto the top of the ring.

The veneer stuff can be cut with kitchen scissors (just don’t let your significant other see you do this) to a size that fits within the steering tube and allows for about a ½ inch overlap. Apply some JB weld between the two parts that will be overlapped. This will sandwich the JB weld between the two layers. Then, apply some JB to the inside of the ring so that there’s JB all over the place securing the piece of veneer to itself. Let this sit overnight.

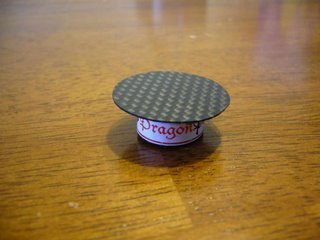
Next, cut a piece of carbon for the top cap (mines about 1 ¼ in diameter). Then place the topcap piece upside down on your work area, set the ring on top of it, and apply JB to the interior of the unit, coating it well. Let that dry.


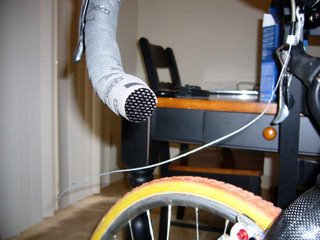
Then push it into place. Simple.


Stock topcap assemblies with steel bolts can weigh 16.2 grams (I just weighed one I had in my tool box) you can drop this weight by using an aluminum bolt or you can make one as I did.

My carbon topcap weighs only 1.8 grams. And again, it looks really cool.

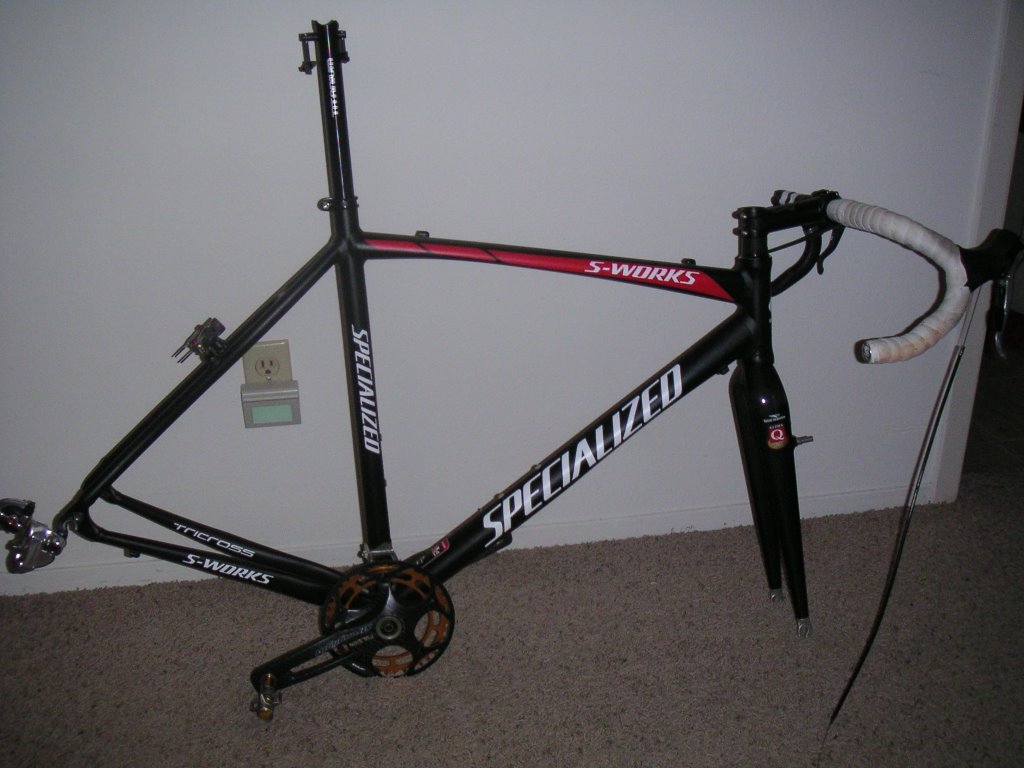
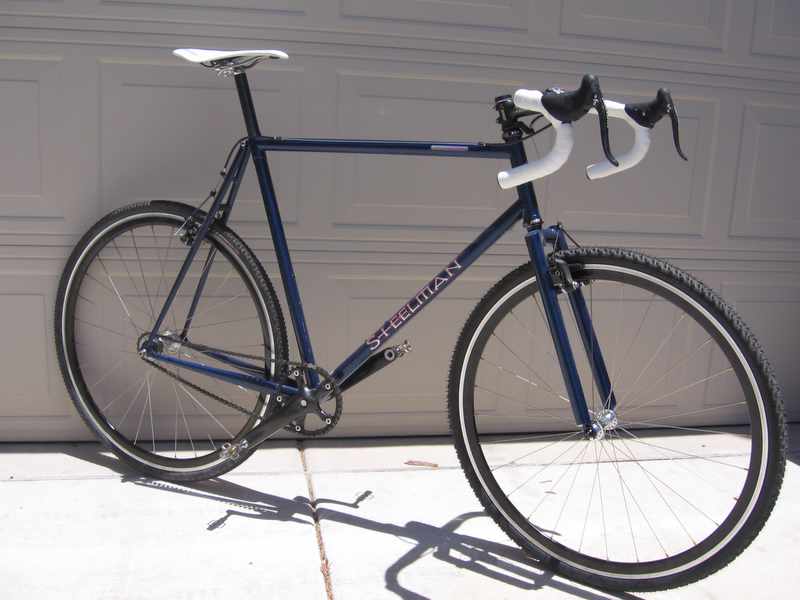
And yes, for those playing the home game, that is my Specialized Tricross that is almost built up.

Thursday, June 29, 2006

The current National 2006 CX calendar

So, I've been collecting race dates for the 2006 season and organizing them into one location. That location is here.

If you are a race director and want your event to be added to this calendar, email me the info for your series to plusonelap@gmail.com

Wednesday, June 28, 2006

DIY: Making Bar End Caps


This is a little tutorial on how to make your own carbon bar end “plugs”. I put plugs in quotations because these are epoxied into place (how often do you remove your bar end plugs anyway?).

This is a really easy project to do and fun for the whole family! Well not really. Unless your whole family likes messing around with JB Weld and carbon fiber dust in the pursuit to lose about 5 grams and to pimp your ride.

The concept is that you don’t need to have your bar tape go into your bars, just tape it off down there and have these lightweight sexy carbon weave bar caps doing the trick. For the ultra weight weenie who doesn’t think he needs bar plugs or blockers, you do. I took a hunk of organic material out of my thigh once because I went for a short test ride on my CX bike just to see how the derailleur was shifting, I saw a little trail, crashed and my thigh jammed into my open bars. Ouch.

Anyway, I got my carbon fiber plate from Dragonplate.com. You don’t need too thick of stuff, because there’s really no stress placed on this item. I had a circle template, found the right size circle (1” is pretty close or 15/16) Then I just shaped it down into a pretty good circle on a bench grinder (Dremel would work but not as well) and JB welded it onto my bars of choice.


Plastic cheapo bar plugs are light at about 5-6 grams a pair. Mine weigh .8 grams (maybe 1 gram when you add in the JB weld). And they look better.

Next time, on the +1lap DIY channel, I’ll show you how I made my carbon topcap, and saved myself about $50 bones.

Tuesday, June 27, 2006

Racing: Nashville Cyclocross

Not to be outdone, the Nashville crew has come out with their race series info as well. Go here to check it out.

They even have cash awards!

If you have a cyclocross series you'd like to have promoted, email me at plusonelap@gmail.com

Racing: Idaho cyclocross


Calling all Idaho-ians...heres your race calendar. The Race director for the Idaho cyclocross series has emailed me a link to their website of all the cross going down in that state this upcoming season. Go here for the info.

All other race directors, email me your race dates to plusonelap@gmail.com so that your race can be featured on +1lap as well.

Friday, June 23, 2006

Buy my cranks--sold


Thanks, they sold at my buy it now price.

Yeah, so im selling my FSA Superlight cranks over on the ebay. If you need a set of cranks that only weigh 373 grams. For reference, Shimano Dura Ace 7700 in 172.5 weigh 470 grams. You'll lose almost a 1/4 pound off your bike! Link

They are 172.5mm long and ISIS bb compatible and 130 bcd bolt circle. These sold for $166 in auction, then the douche decided he didnt want them anymore, then I relisted and they didnt sell, now im relisting again. Maybe one of my dearest readers of +1lap will decide to upgrade with my cranks?

Wednesday, June 21, 2006

Browsing Flickr...Vanilla cyclocross.


So I was browsing Flickr awhile back and came across this Vanilla cyclocross bike. Its pretty sweet. If anyone wants to claim it as their own, let me know, I'd like to put it into the custom cross gallery. Im a sucker for the gold accents. Link

Saturday, June 10, 2006

Finally, got my fork!


Yeah so I've had this badass frame sitting in a boring old box for the last who knows how many months, waiting for a fork. Last week, I decided to go ahead with the build with my Woundup fork. Then, I got a pretty killer deal on an Alpha Q cx fork, bought it, got it today, and now finally the build is on!


Im excited, this should be a cool bike once its done, and I think I have all the parts necessary now. The Alpha Q wasnt much lighter than the Woundup, but it looks pretty cool, and it was a little lighter. The fork came in at 550 grams (including the starnut) in a steerer tube length of 208mm.

Im selling my Woundup on the ebay...here.

Monday, June 05, 2006

My interview with Jonathan Page


An interview with United States’ best ever cyclocross racer, Jonathan Page? Here? Yep, JP sat down with Plus One Lap to answer some burning questions as he prepares to enter the 2006 cross season. Hear what he had to say…

Plus one lap: What's it like being one of the only Americans in a Euro-dominated sport?

Jonathan Page: It's getting much better now that I have earned some respect over there. I don't feel any sense of alienation or anything over there. I feel like they treat me as just another competitor now but it wasn't easy!

+1lap: How's your Dutch?

JP: I can swear and I know a lot of bad words. I hated school growing up so I just can't get myself to go to classes like my wife does. Soon my 1.5 year old daughter will know more Dutch than me and then I guess I'll have to get into school...

+1lap: You got food poisoning before Nationals last year and still placed third, what was the decision process like to determine whether you were going to race or stay in bed? What was it like racing Nationals in that condition?

JP: For me, there was no decision. I knew I was going to go out there and try, no matter how bad I felt and even if I didn't make it more than a few feet past the start line. Otherwise I would have felt like I just gave it away. There were a lot of people that were counting on me; sponsors, family, friends, supporters...I didn't want to let them down. But honestly, it was horrible racing in that condition. I was vomiting every lap and I had to throw my skinsuit away...if you know what I mean. After a few laps, I no longer cared what place I got, I just wanted to make it through. I felt like I at least owed that to everyone. But, afterward, I paid for it too. My wife recovered 2 days later but I was still suffering after a week. It's not fun to race when you can't really race. I hope it was a once in a lifetime experience.

+1lap: Is your only US race this coming season going to be Nationals, as you have done in the past?

JP: Probably. Unless nationals is held in December instead of in Jan. like the rest of the world. Then I won't come at all.

+1lap: You got 10th in the World Champs this year, was that one of your greatest sporting accomplishments? What was that race like for you? Were the stairs as brutal as they looked on Sporza (Dutch TV)?

JP: I am definitely proud of that result and I know that there is still room for improvement so that makes me very hopeful and motivated for the next seasons to come. The race was fast and hard. I made 1 mistake with less than 3 laps to go and couldn't make up for it. That was disappointing because I had made it through the selections and just as I settled in for the final, I fell. Yeah, the stairs were hard but then you had to get on your bike and climb a hill at full speed. That was harder.

+1lap: Any tips to amateur racers as far as choosing the "right" tire pressure for a particular course? What sorts of principles guide your air pressure choices?

JP: Tire pressure is an individual choice I think.

+1lap: What would you say is your weakness in a CX race? Your strength?

JP: My wife is typing these answers as I talk while coralling my daughter who is jumping on the hotel bed...I was thinking of my answer for weakness and she said "thats easy...selling yourself"! Thats true. I have worked hard to make my weaknesses in the races not weaknesses anymore but I missed a lot of opportunities in the sport before I got some help from a friend that has become an agent. So, my biggest weakness is the business part of the sport. My strength? My biggest strength is my bike handling skills.

+1lap: In your opinion, why is cross suddenly becoming more popular in America?

JP: It's fun to watch! More fun than road racing. It's also fun to participate.

+1lap: If you were never a pro-cyclist what would you want to do instead?

JP: I would want to landscape in the summertime and teach skiing in the winter.

+1lap: You're going to be celebrating your 30th birthday this September, has that made you think about how many more years you have as a pro bike racer? Any thoughts about what you'll do after you stop racing professionally?

JP: Knowing that I will be 30 has made me realize that now is the time to get some great results so people will notice and so I can race for more years to come. I'm going to continue spending quality time with my family and hopefully not get stuck working behind a desk. I'll try to find something I enjoy.

Jonathan Page got 10th place at last year’s Cyclocross World Championships (the best ever placing for an American). He can be found on the web at www.thejonathanpage.com.

Photo courtesy of www.thejonathanpage.com

My sub $40, 4 bike indoor rack


I made a bike rack a few months ago, and thought you folks might think this is interesting. Yeah, they make professional wall-mounted bike racks, they even sell them at Target. But this rack is better. Why? Because, it holds 4 bikes easily, in the space normally needed for 2 bikes, and it cost me less than $40 and only requires 2 small holes to be drilled into the wall to hold it up.


The parameters of the rack were that it 1) needed to hold 4 bikes. None of the wall mounted racks available can hold 4 bikes, usually only 2. 2) the bikes couldn’t stick out from the wall very far as the room is small. 3) no major holes going into the walls as this is an apartment and I want my deposit back. 4) I didnt want it to cost much.

This was a fairly simple project, after the idea was down on paper. And I think anyone with moderate skills could build this.

Materials required:
four 2x4’s,
two ¾” threaded rods that are 24” long and bolt hardware,
one ½” threaded rod and hardware,
screws,
2 steel plates
and some pipe insulation.

Tools needed:
Saw,
drill,
¾” auger drill bit,
½” auger drill bit,
drill,
stud finder,
pliers/crescent wrench.

The basic premise is that two bikes are hung on each ¾” rod which comes out from the top of the structure. Also, the 1/2” rod is mounted on the rear beam of the rack to stop the tires from the left series of bikes to sway into the right series of bikes. I've attached a picture of the dimensions.

Here are some measurements (note: I am 6’3” and therefore my bikes are on the larger end, therefore these measurements should work for all bikes)

There are 2 height beams that are 72” tall each

There are 2 cross beams that are 66” wide each

The right threaded rod is 9” in from the right side of the structure

The left threaded rod is 12” in from the left side of the structure

The entire structure is 5 ¼ out from right wall.

Top of lower crossmember is 15.5” from the floor.

The entire unit can be placed on a wall that is at least 87” wide.

The crossmembers must be screwed onto the outside face of the beams (to allow room for the bolts on the backside of the threaded rods)


Threaded rods use 2 lock washers, 2 flat washers and one two bolts each.

The top crossmember carries all of the weight of the bikes, therefore, to minimize the amount of twist in the top crossmember, I bolted on a steel plate to the end joint of where the beam and the cross member meet.


Lastly, find the studs in your wall, and screw the unit directly into the stud----not just the sheetrock. I was only able to put 2 wood screws into the wall, but that has been fine thus far. A lot of the weight from the bikes is transferred to the floor. The wall screws are only there so that the unit stays attached to the wall (they don’t hold much weight).

Here's a picture of the lower rod holding the wheel of the left bike from hitting the right bike.


Under the structure, I’ve found that it’s a great place to store my cycling and running shoes, helmets, accessories, etc. Also, I have thought of adding a shelf above the bikes, mounted to this rack to aid in extra storage.

I have been using this for the past 3 months without any issues. In order to get 2 bikes per rod you need to put one bike’s front wheel in the rod and the other bike’s rear wheel. The picture only shows 2 bikes and 2 framesets in the rack, but it holds 4 bikes fine.


Plus One Lap Weight Wiki

I decided to start a WIKI bike weight list called Plusonelap.com Weight Wiki found here: http://plusonelap.pbwiki.com/

A wiki is defined as "A website or similar online resource which allows users to add and edit content collectively." Source One of the most popular wikis out there is Wikipedia

The benefits of a Wiki are that anyone can post their bike component weights to the wiki and it is added immediately, no longer do you have to wait for a moderator to upload your weight to the listings. Its a site ran by you, the weight obsessed.

The only downside is that the listings cant be sorted by lightest,heaviest, etc...instead I've tried to make them alphabetical.

The process to become a contributor to this wiki is on the plusonelap wiki website----but basically, you register with pbwiki.com
Then, you send me an email at plusonelap@gmail.com to request the wiki's password so that you may begin adding component weights.

Hope you guys like it. Now go post some weights.

Dual Gallery bike #5, #15: Dan's Steelman


The first singlespeed cyclocross bike in either gallery is this Steelman which weighs in at a light 17.05 lbs putting it into both galleries, the second dual gallery bike. Its #5 in the Custom Gallery and #15 in the Lightweight one.


Build List
Frame- Steelman Eurocross custom 58x59
Fork- Sibex ti
Wheels- White Ind. H1/Eno laced to Niobium 30mm rims on DT revos
Tires- Front Michelin Mud, Rear Bontrager Jones, Tubed, but will be replacing with No Tubes
Stem- Ritchey WCS, Ti bolts, Custom carbon top cap
Bars- Deda 31.8 Newton shallow
Levers- Record
Brakes- Avid shorties, tuned
Cranks/bb- Storck Power Arms, TA 39 tooth ring., crap steel sealed bearing BB.
Pedals- Egg Beater Ti, will have shortened spindles added shortly.
Seat- SLR
Seatpost- Record.

Total weight 17.05 lbs.

The bike could be a lot lighter and when it is finally done will have probably shed 1/4 lb or so. It rides very well and will be my back-up pit bike. Thanks Jeremy for the blog, everyone please check out the website www.arcvelo.com.

If you have a handbuilt or sub 18lb cross bike send it to me at plusonelap@gmail.com

Sunday, June 04, 2006

Wash your gloves


So, this weekend, I went through a lot of my boxes in the back bedroom and threw away a lot of crap. In one of the boxes, was an old pair of cycling gloves. I remembered them from a few years ago, and they stunk. Sweat, grease, dirt, snot and god knows what else combined make a bad smell. I dont know if youre supposed to wash gloves, I never have, I've never heard of anyone doing it, but I did.

It was pretty simple, I put some hot water into my sink, squirted some Dr Bronners soap in as well and scrubbed the two gloves together. When the water turns to chocolate milk, its time to drain and repeat. The second time it looked a little less brown. Then I put them out in the sun to dry. And now they seem as good as new.

This isnt rocket science and I wont win a Pulitzer or a Webby for this article, but I've never read of someone washing their cycling gloves. Maybe its just so common that no one thought they had to write a moronic article----but this is the internet.

Anyway, if your gloves stink wash them. They wont disintegrate, melt, shrink or anything else. Ride on.